How To manage an application
First add some services and an application to your MICO instance.
Note
For this tutorial the following assumptions are made:
The services UST-MICO/react-redux-realworld-example-app and UST-MICO/spring-boot-realworld-example-app
have been imported from github.
The service UST-MICO/react-redux-realworld-example-app has an interface
frontend with Exposed Port Number 80, Target Port Number 80 and type TCP.
The service UST-MICO/spring-boot-realworld-example-app has an interface
backend with Exposed Port Number 80, Target Port Number 8080 and type TCP.
The Application New Application includes both services.
To add the services to the application, use the Services button on the right.

Editing deployment information of services
Some services need environment variables at runtime to work correctly.
This is also true for the UST-MICO/react-redux-realworld-example-app service.
The service needs the environment variable BACKEND_REST_API to
find the backend at runtime.
The deployment info for a service contains these environment variables and other deployment specific information, like the number of replicas, to start. It is displayed below the service in the box on the right.
To edit the deployment information use the gear icon.
In the dialog you can edit the following settings:
- Replicas
- The number of replicas to scale the service.
- Labels
- Key value pairs that get mapped to kubernetes labels.
- Environment Variables
- Environment variables to set for the container.
- Interface Connections
- Connections to service interfaces of other services. The address of the service interface gets stored in a specified environment variable.
- Image Pull Policy
- When to reload image from dockerhub.
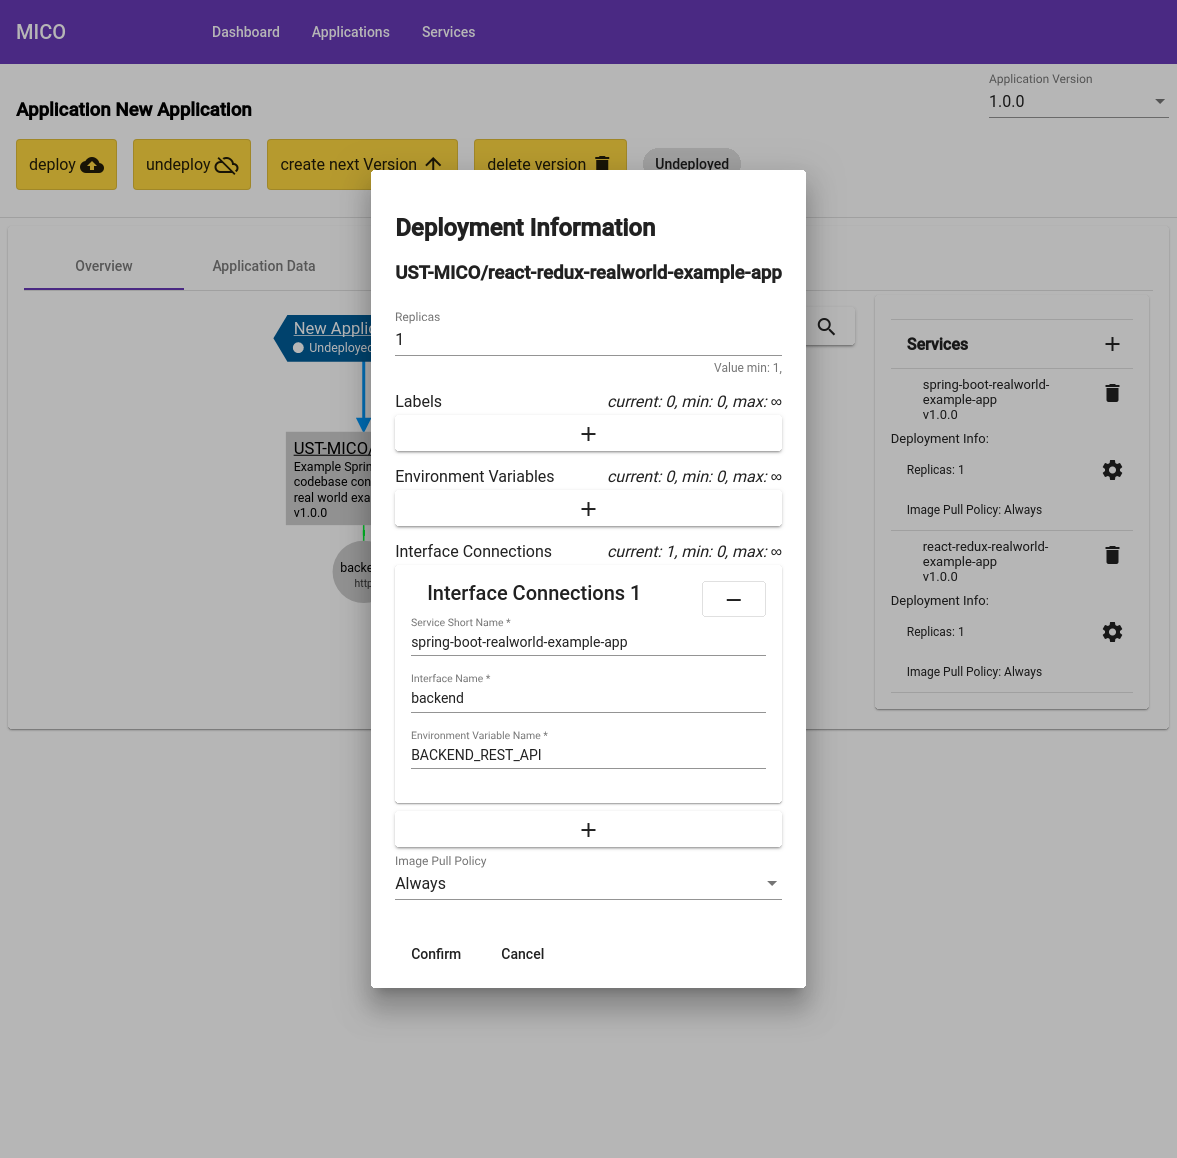
To connect the frontend with the backend service, we need to add an interface connection with the following values to the frontend service:
- Environment Variable Name:
BACKEND_REST_API - Interface Name:
backend - Service Short Name:
spring-boot-realworld-example-app
Warning
The actual values depend on the included services of the application!
The assumptions for this tutorial are listed in the note at the top of this tutorial.
You can also connect the service to the backend interface in the grapheditor.
To do this hover with the mouse over the UST-MICO/react-redux-realworld-example-app
service in the graph and drag one of the appearing circles to the backend interface.
After dropping the edge on the backend interface insert the BACKEND_REST_API into the dialog and confirm.

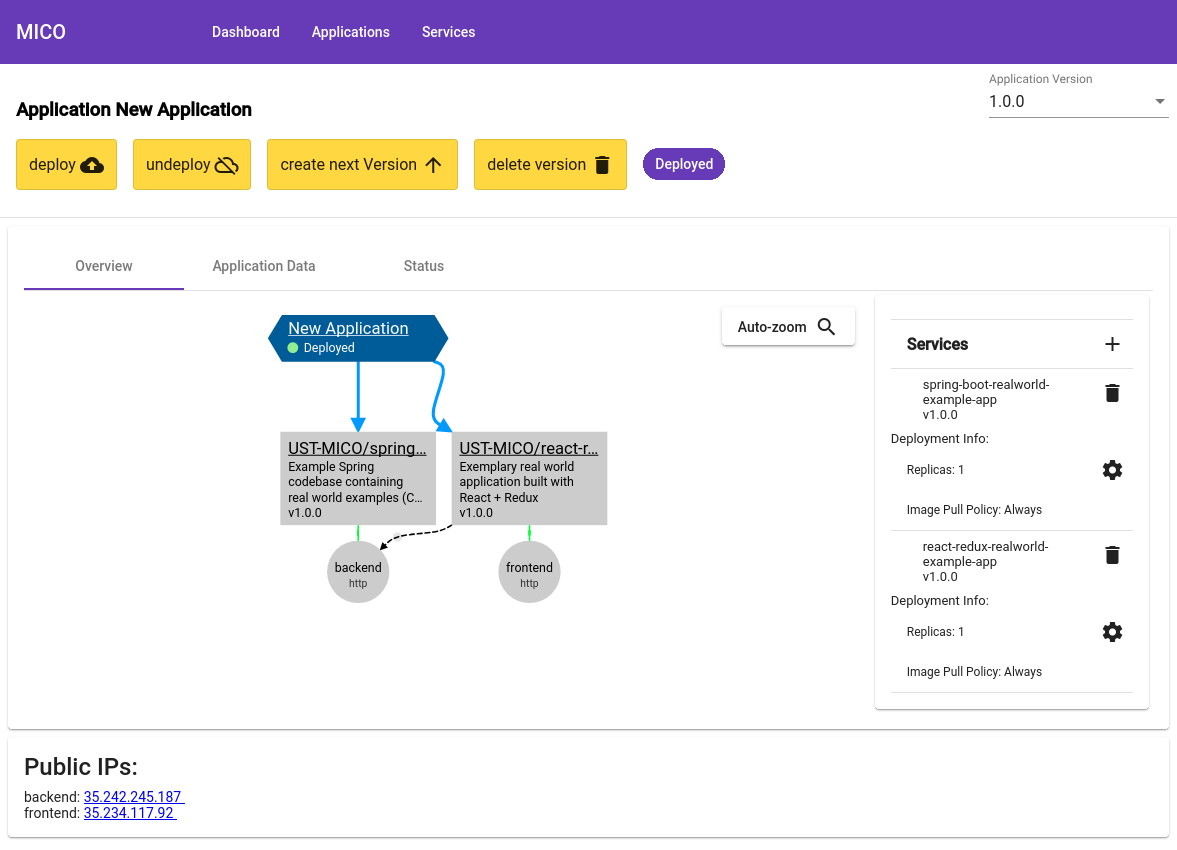
Deploying an Application
To deploy an application, use the deploy button below the application name. The actual deployment can take a few minutes, depending on the services included in the application.
Upon completion of the deployment, you can see a list of ips under Public IPs. Each service has its own ip.
Note
kubectl commands to see what’s going on in the background (also helpful if you need troubleshooting):
- Watch all pods in the whole cluster:
kubectl get pods --all-namespaces --watch - Watch the pods that are building the Docker images in the background:
kubectl -n mico-build-bot get pods --watch - Get the builds:
kubectl -n mico-build-bot get builds - Get information about a specific build:
kubectl -n mico-build-bot describe build build-react-redux-realworld-example-app-v1-0-0 - Get the logs of a specific build:
kubectl -n mico-build-bot logs <pod-name> -c build-step-build-and-push - Get all resources that were created as part of the deployment of the application(s):
kubectl -n mico-workspace get all
Undeploying an Application
To undeploy a deployed application, use the undeploy button below the application name.
Create a new Application Version
To create a new application version, use the create next Version Button and choose the next version to create.
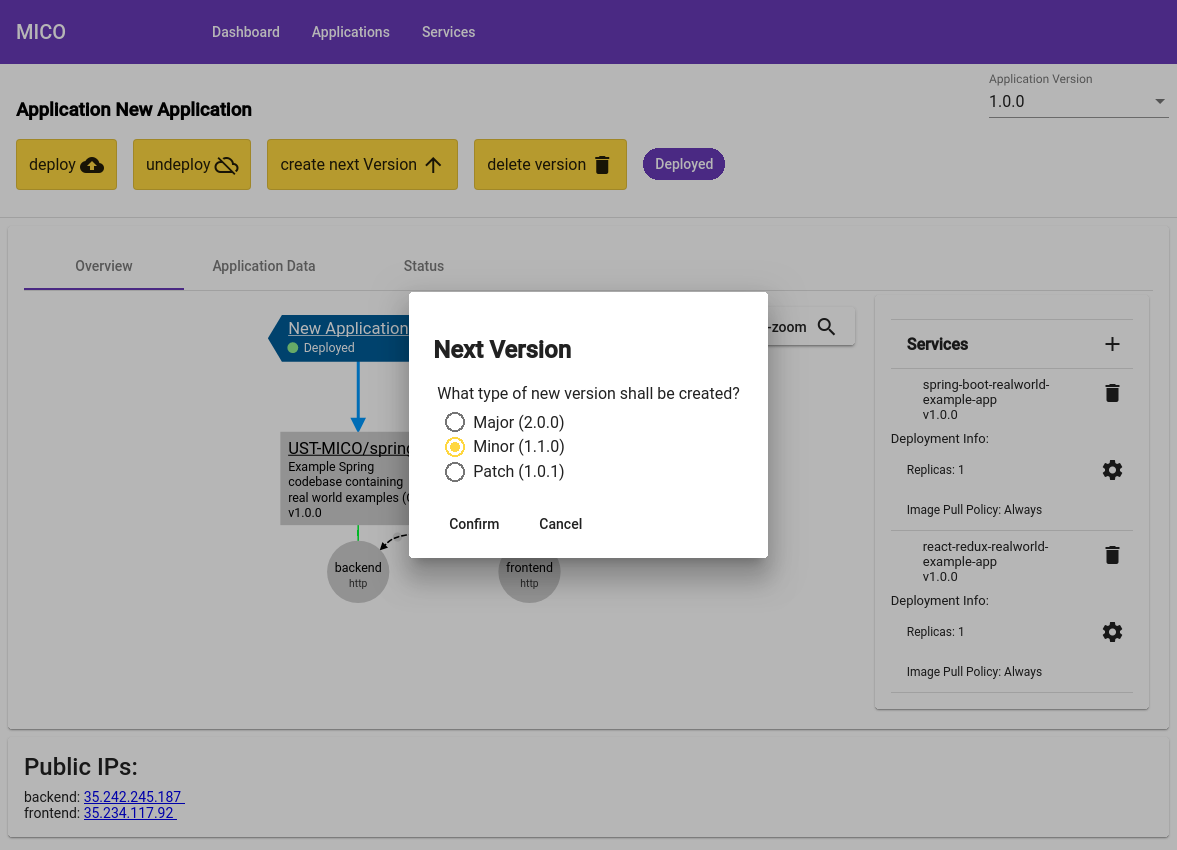
The new version of the application will have all services and deployment information of the old version.